For as long as I can remember, I’ve been fascinated by before-and-after stories in interior design. Then, when I moved to Dalmatia 15 years ago, I immediately fell in love with the charm of authentic stone houses. Ever since, it’s been a dream of mine to renovate one of these beauties together with my husband. I can’t quite recall if it was my love for traditional Dalmatian architecture or the charm of rustic interiors that caught my attention first. Either way, the two make a perfect match. For years, I dreamed of turning this passion into reality—creating a place reflecting my taste, so that travelers, too, could experience it firsthand.
A Dream Comes True
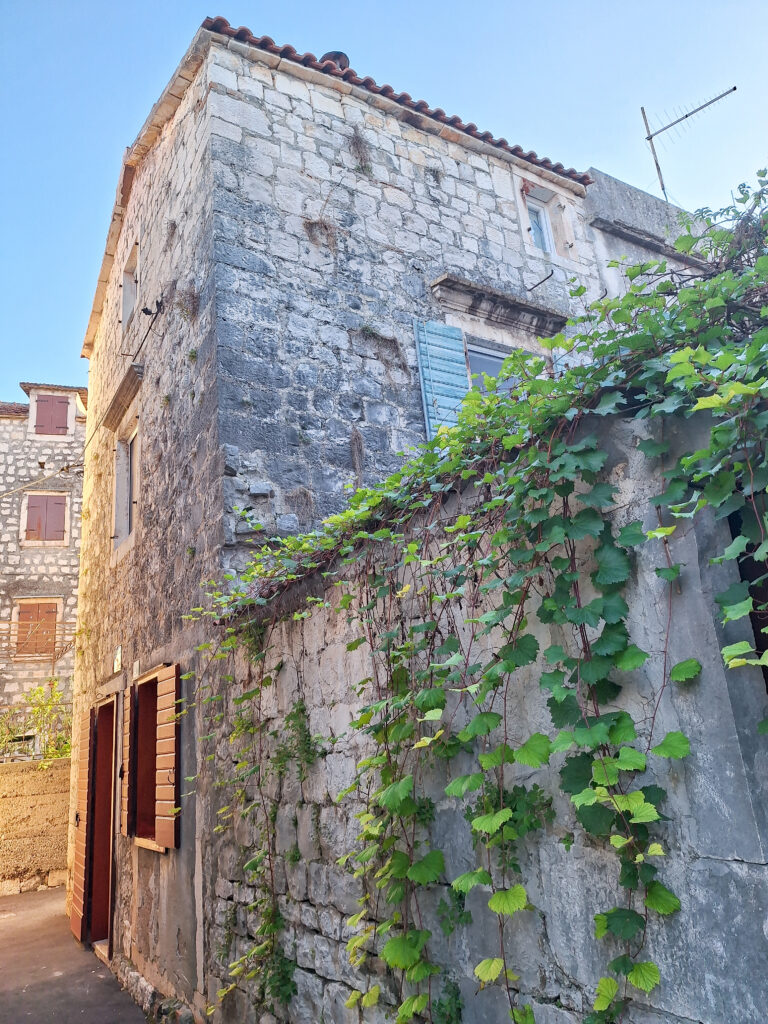
Last summer, we were lucky enough to find an old, abandoned stone house in the heart of Trogir’s old town at a reasonable price. Of course, we didn’t hesitate for a second, and we finally began renovations this spring. I took on the design, selecting materials, and choosing the furniture, while my husband handled most of the physical work, bringing our vision to life. Adding the final decorative touches was, once again, my warmly welcomed task.
Assessing the Condition
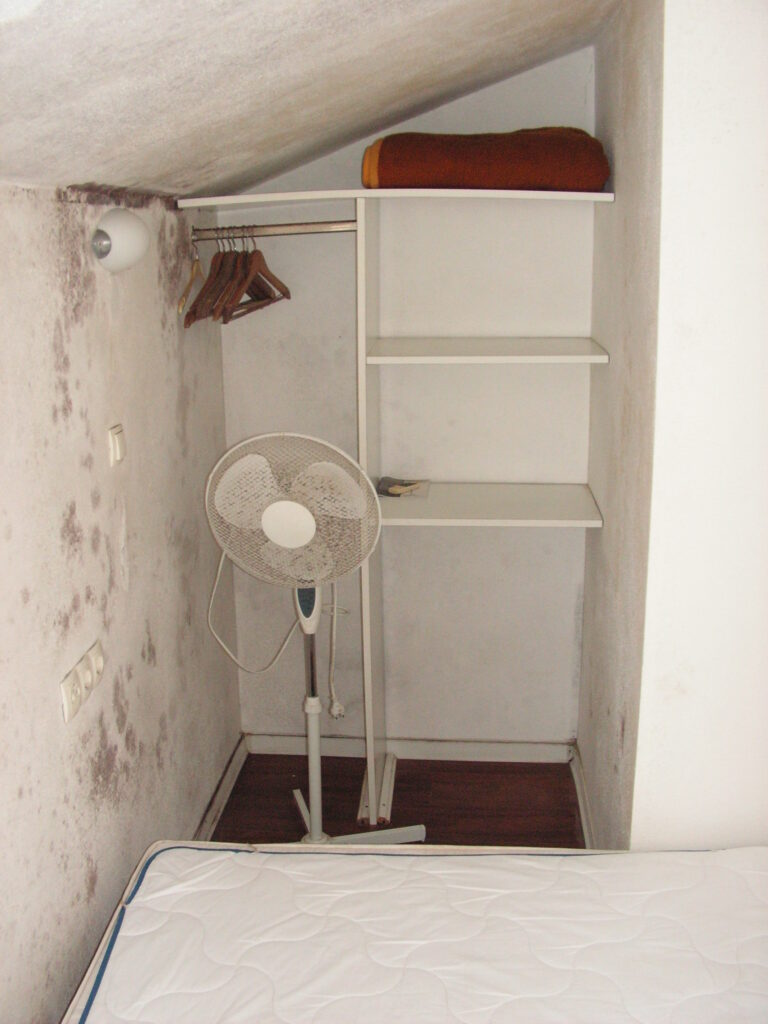
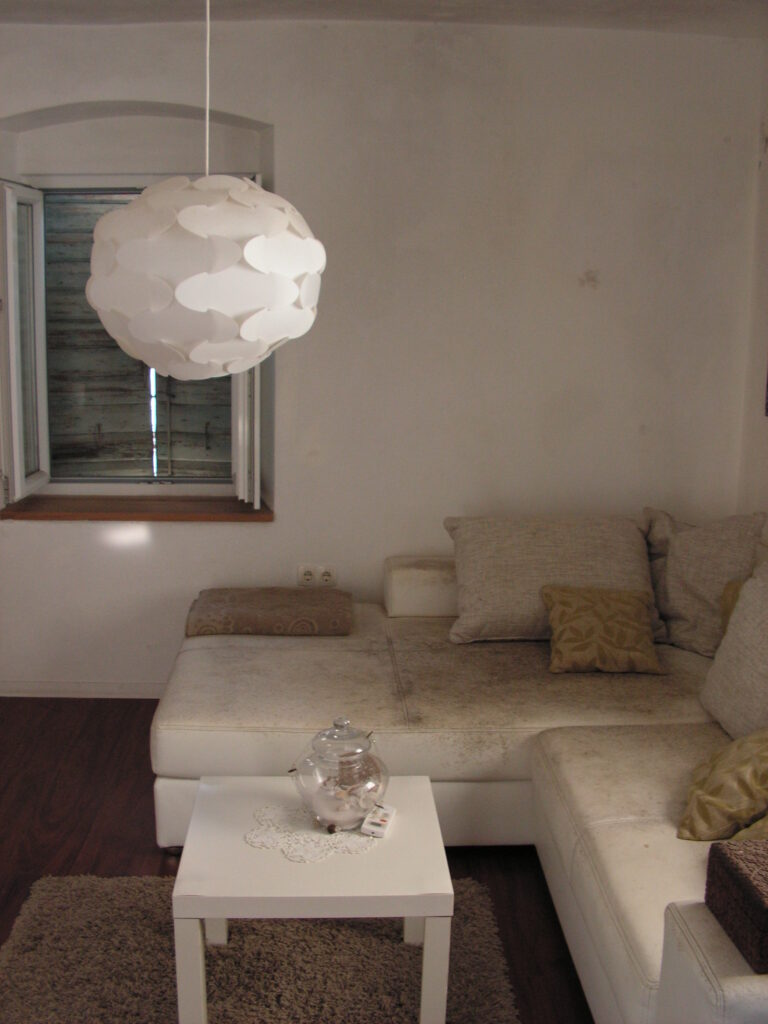
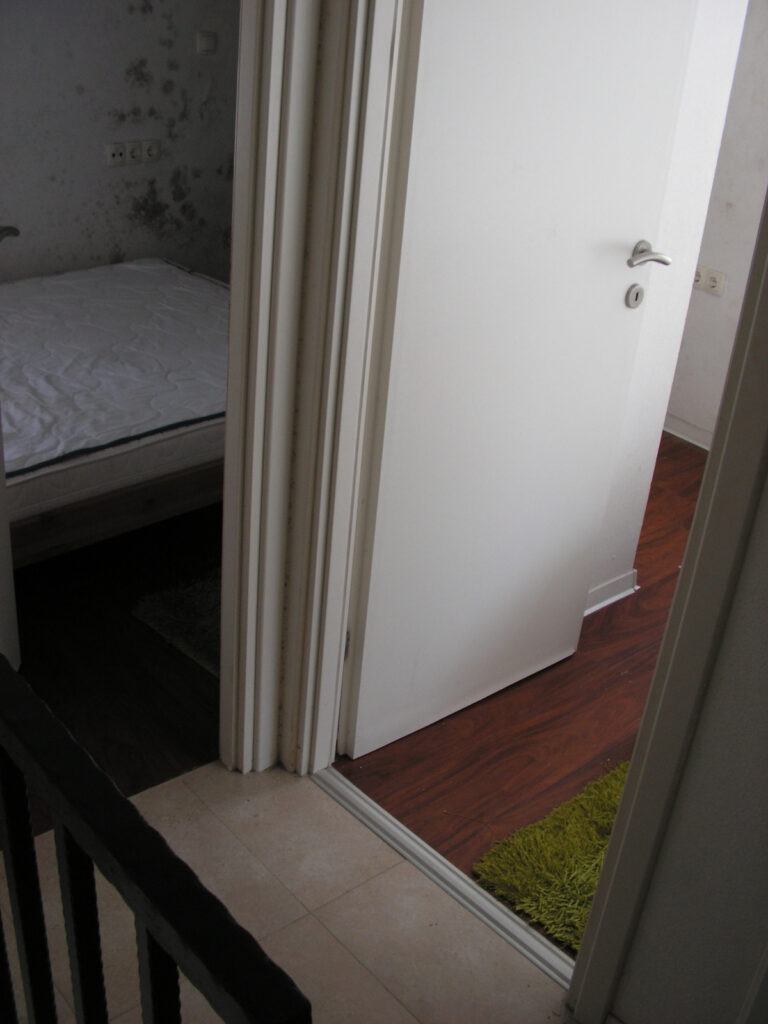
We found the house in pretty bad condition when we finally took it over. While it was structurally sound, much of the furniture was ruined by dampness. Mold covered the walls because the previous owner had sealed it up and left it for 7-8 years. The hermetically sealed plastic windows prevented air circulation, leading to moisture damage.
Entering the house was like stepping into a time capsule—we were just struck by the musty smell. We could hardly believe our eyes seeing the extent of the damage dampness could inflict on furniture in just a few years. We didn’t even know for how long the house had been abandoned until we found food in the kitchen cupboards with expiration dates from 2017! Fortunately, the damage to the walls was superficial and relatively easy to repair. However, we had to get rid of most of the furniture and the laminate flooring.
Layout and Design Plans
The house covers a total area of 58 m². Although it’s small, I could easily visualize the charm it would have once the work was done. Our goal was to reach a blend of rustic character and modern comforts. Despite its small footprint, the house is spread over three floors, a common layout in similar stone houses.
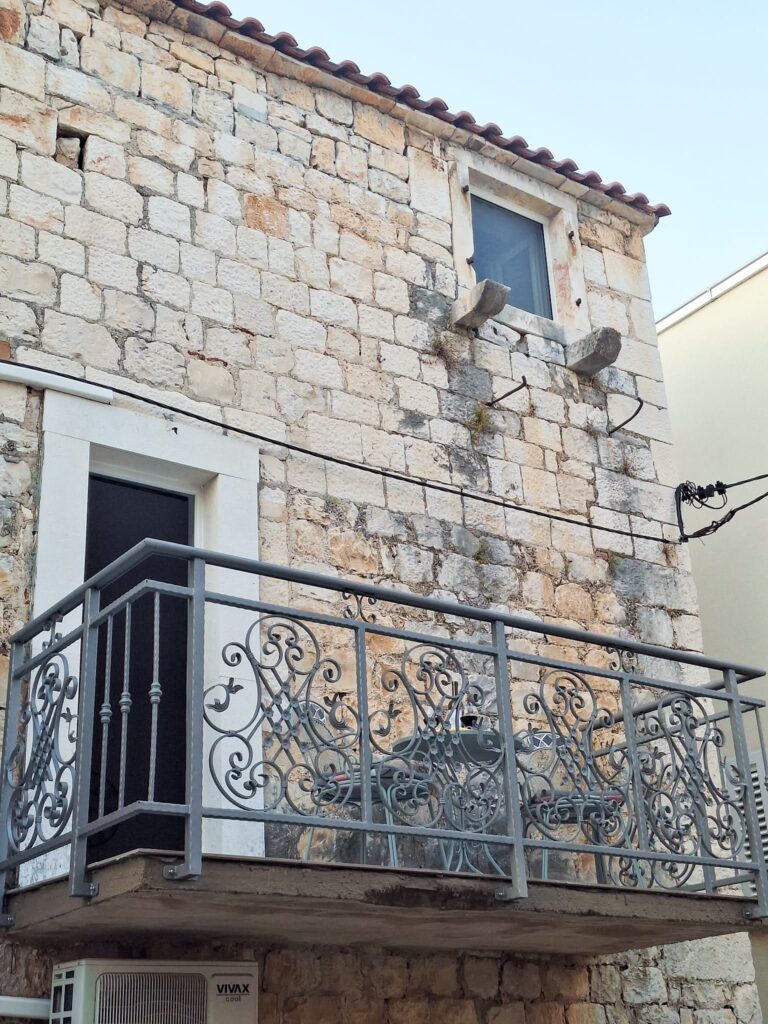
The kitchen, dining room, and bathroom are located on the ground floor, the living room on the first floor, and the bedroom on the second floor. Since our plan was to prepare the house for the tourist season this year, we didn’t make any dramatic changes to the floor plan. The only modification was on the second floor, where there had originally been two tiny rooms with limited space. We decided to combine these rooms to create a comfortably sized bedroom with an en-suite toilet.
The Work Begins
We aimed to create an open, airy space instead of two cramped rooms. This layout also suited the local climate much better. Our decision reduced the apartment’s capacity, but we wanted to prioritize guest comfort over maximizing rental income. To achieve this, we removed all the walls in the attic. Only the small but essential toilet remained, which is especially useful, given that the main bathroom is on the ground floor.
With the new bedroom layout taking shape, the hard work began. At first, we cleared out the old furniture, making space for a fresh start on each floor. With only 3-4 months to complete the renovations, our goal was to be ready by early July so we could still capture a good portion of the tourist season. My husband spent every day in Trogir, doing most of the physical labor himself. Meanwhile, I managed the planning side, spending countless hours after my full-time job selecting and ordering all the furniture and equipment.
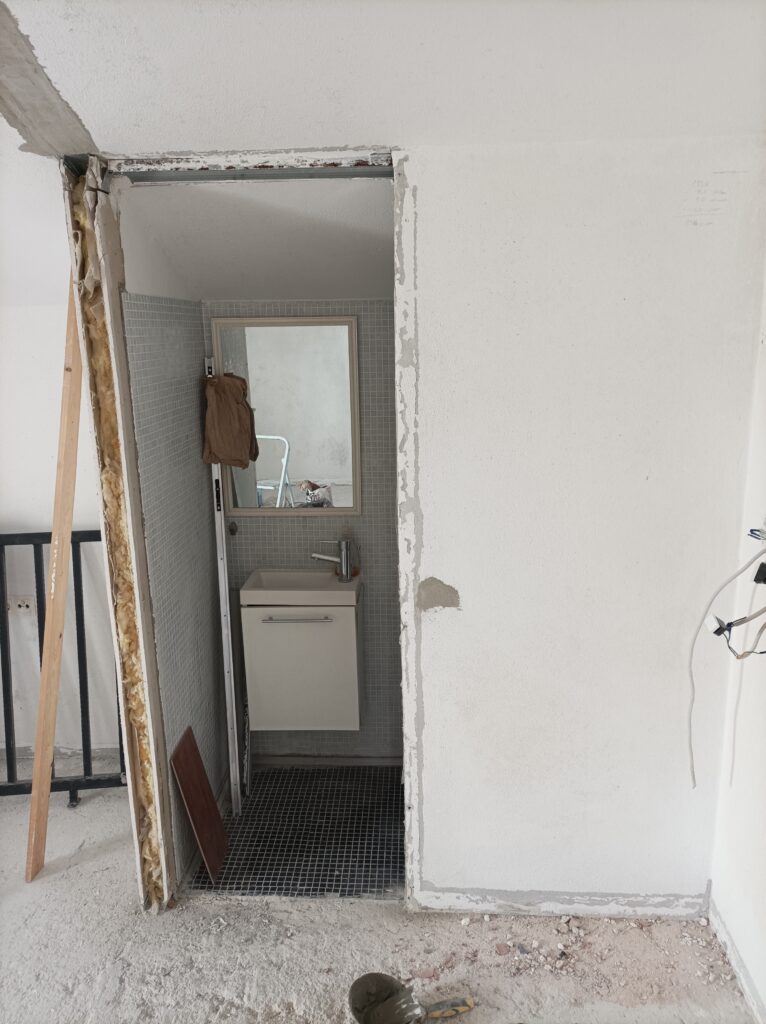
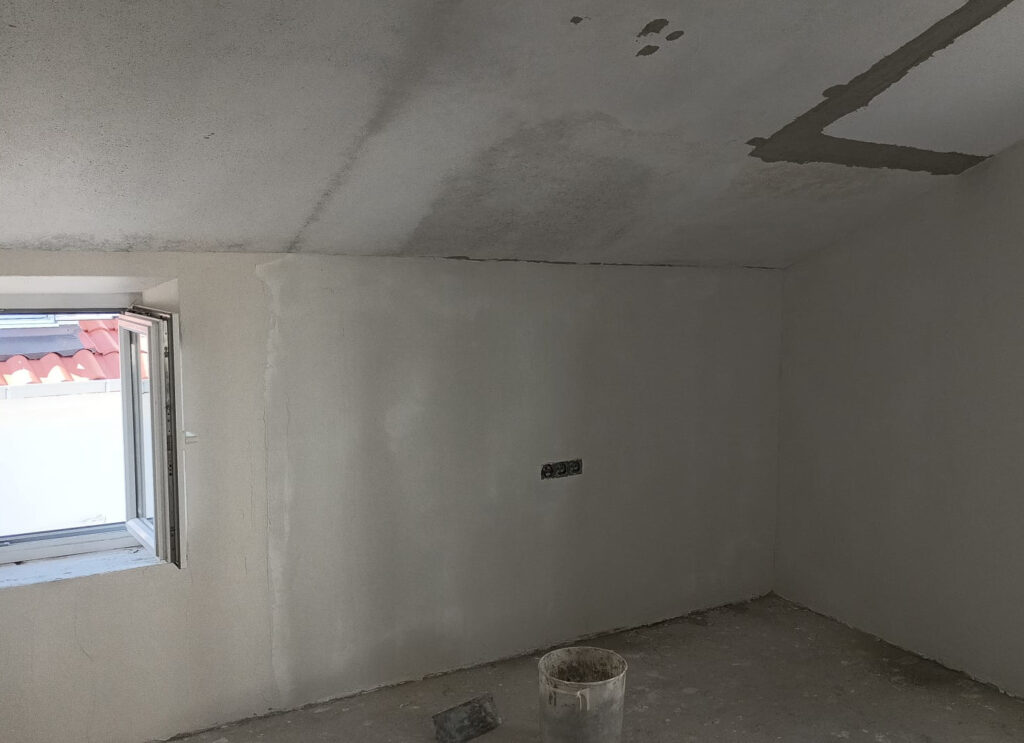
We started with the most complex work in the attic. My husband tore out the old laminate flooring and tiles, and cleaned the mold from the remaining walls. He worked floor by floor. The next step was to putty and paint the walls, followed by laying the new flooring.
During these weeks, my main focus was on planning the furniture layout and finding the perfect pieces I had already envisioned. From the start, I knew I wanted to preserve the house’s rustic charm while creating a simple, light, and airy space with minimal furniture. At the same time, I wanted the interior to feel welcoming, with lots of natural materials like wood, rattan, and cotton.
The Bedroom
For the bedroom, I chose a natural color palette of white, beige, and muted green, with hints of black for contrast. The layout was practically set, with a double bed in the center and bedside tables on either side. I also knew I wanted a dressing table. The perfect one was from IKEA’s HEMNES series, and it was the first piece of furniture I selected for this room. This piece set the tone for the rest of the furniture choices, helping create a cohesive look with its simple yet charming style.
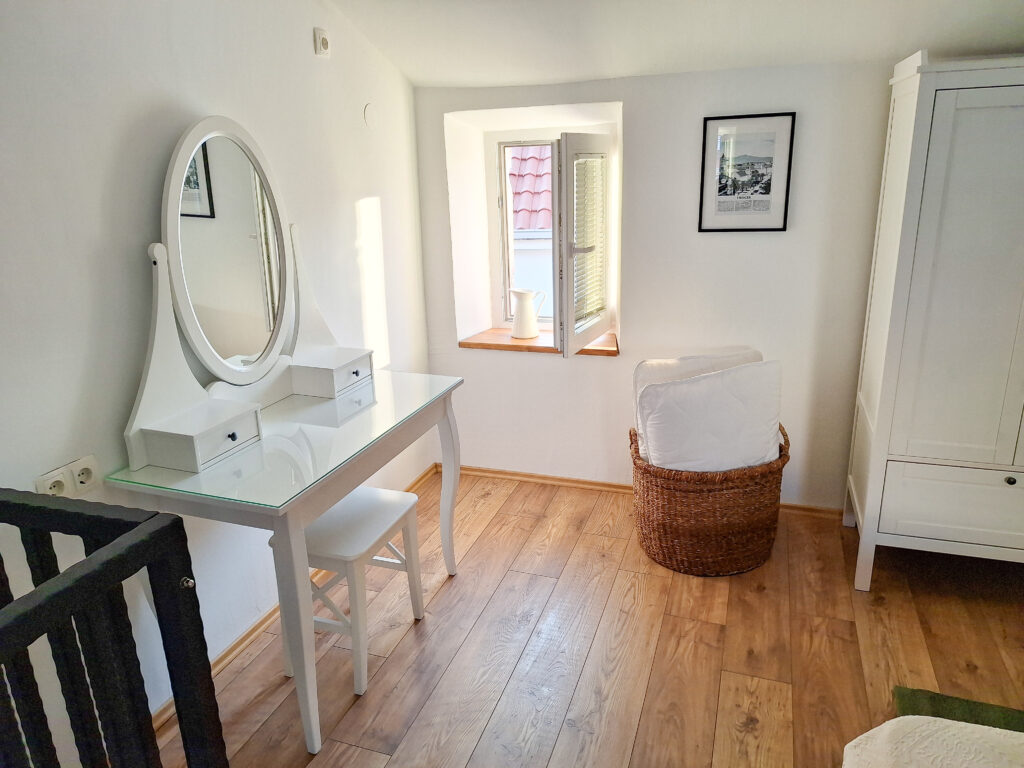
One of the main challenges I faced while redesigning this room was finding the right storage solution. The low ceiling in this attic space proved to be quite difficult. I knew I wanted wardrobes instead of an open clothing rack, but finding ones of the right height was tricky. I remember standing there, feeling completely lost, thinking it would be impossible to find a suitable wardrobe just 170 cm tall. Fortunately, I came across IKEA’s SUNDVIK wardrobe. While it’s typically designed for children’s rooms, its compact size and natural wood finish made it an ideal fit. I found that its simple lines complement the room’s aesthetic, and the wood adds warmth.
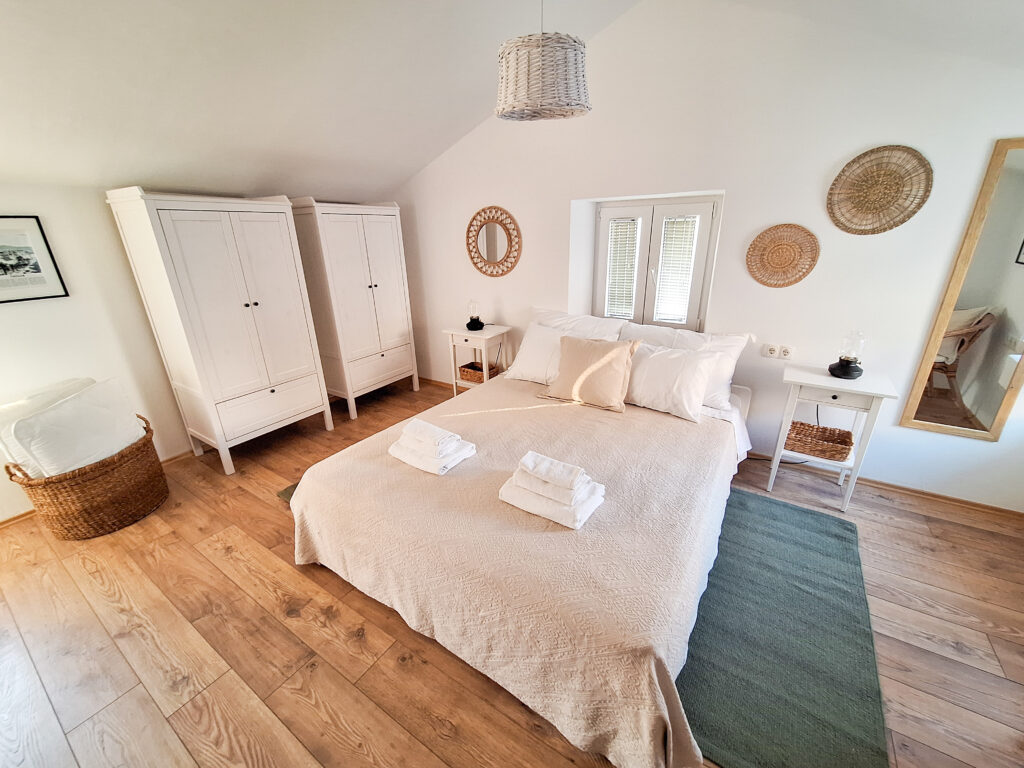
For the bed, I chose a white natural wood frame that blends smoothly with the other furniture, keeping the room feeling light and airy. To balance the white tones, went for rattan elements, including an armchair, a large storage basket, and wall accessories such as mirrors and decorative pieces. These accents added a cozy, organic feel to the space.
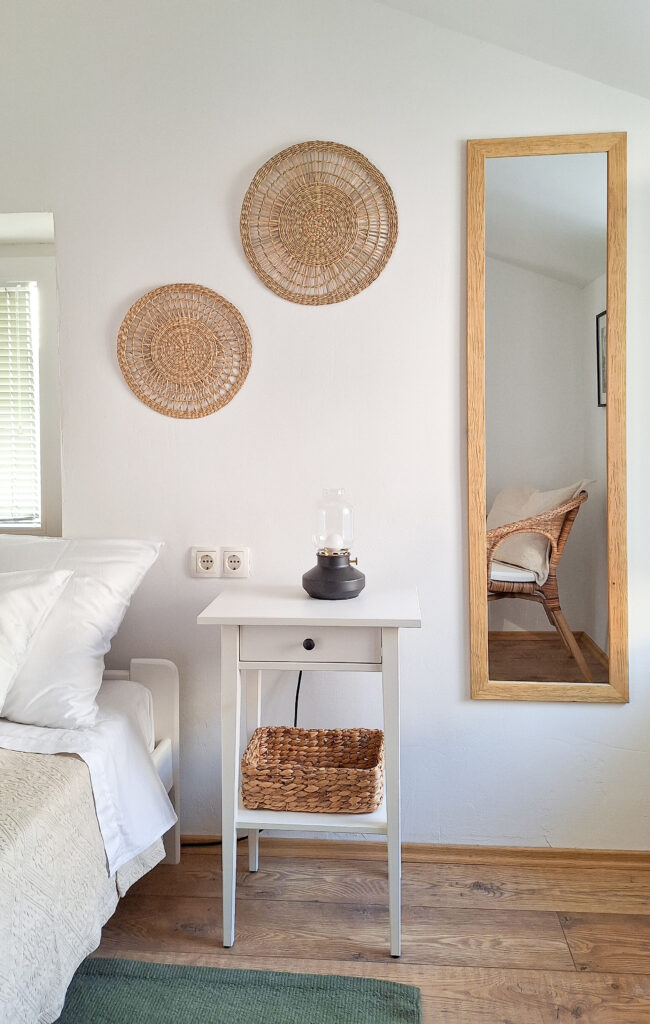
To complete the look, I opted for black table lamps and picture frames to display black-and-white photographs of Trogir’s historic old town. The contrast adds depth, creating a cohesive and harmonious atmosphere.
The Living Room
Next, we moved to the first floor, where the living room is located. The layout here was tricky, as this middle floor accommodates two staircases. In one corner, there’s a spiral staircase leading up from the ground floor, and in another, a steep staircase heading up to the attic. Since we had limited time, we had to work with these existing features rather than alter them.

It seemed natural to place the sofa along the longest wall. This piece became the heart of the living room—I fell in love with it at first sight and knew I wanted to build the room’s design around it. Its floral pattern and cozy, soft textures immediately draw attention, making it the focal point of the room.
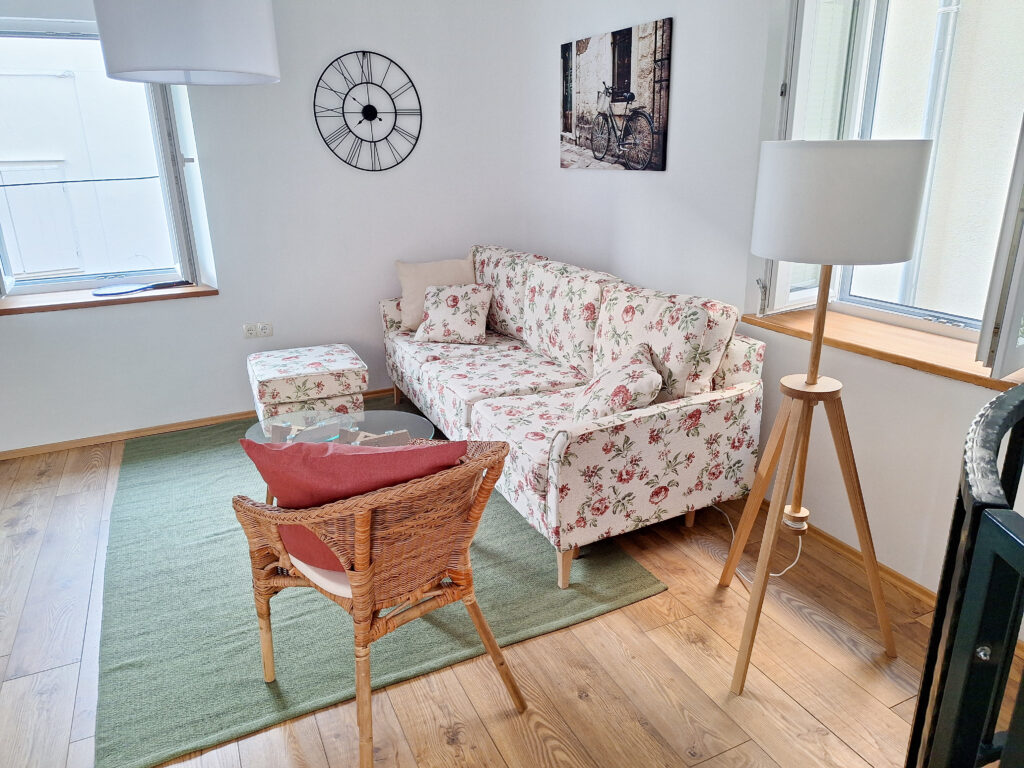
Given the modest floor space, I wanted to keep the furniture minimal yet impactful, creating a light, airy space like in the bedroom. Since the sofa was a larger piece, I balanced its weight by incorporating lighter furniture and natural materials elsewhere in the room.
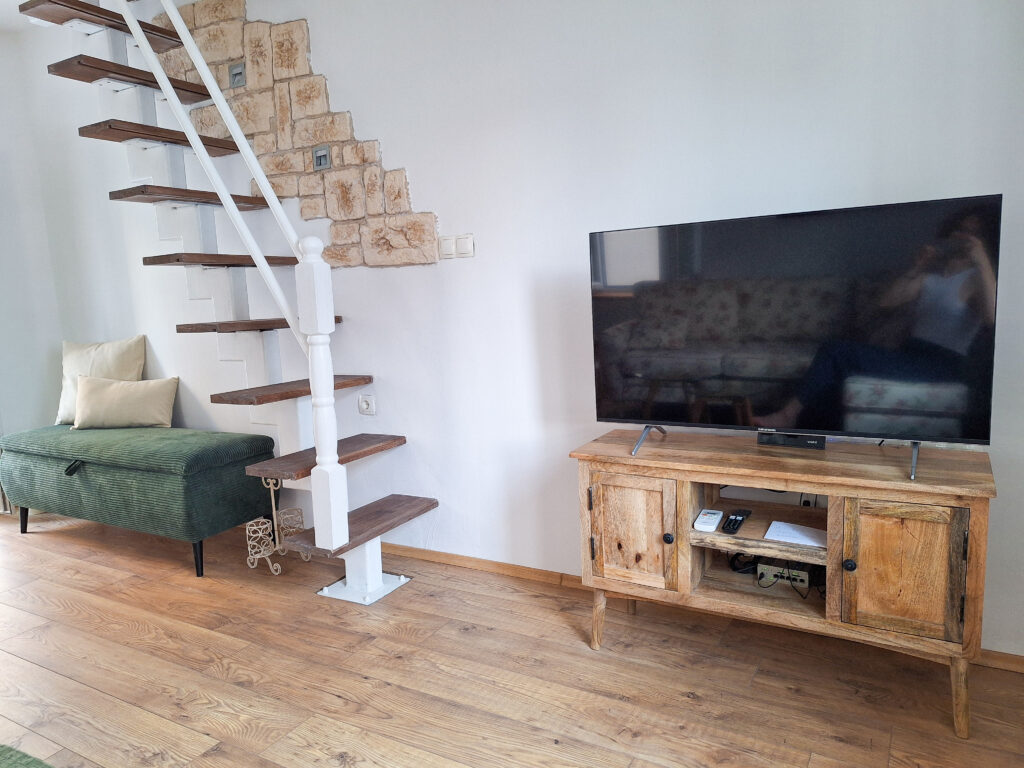
Opposite the sofa, we placed a sleek mango wood sideboard, which also houses the TV. The natural wood tones add warmth without overwhelming the room. I added a pouffe on one side of the sofa and a rattan armchair on the other, adding texture and lightness.
The coffee table was chosen to complement the space without overwhelming it. Its transparent top and light frame ensure the room feels open and spacious.
Another cosy corner…
Finally, the main part of the living room came together beautifully, and I absolutely loved it. However, the area between the balcony door and the stairs leading to the attic caused some difficulty. I needed extra storage but didn’t want anything bulky like a wardrobe or chest of drawers, which could overwhelm the space. So we felt quite relieved when we finally discovered a storage bench in a local furniture store—a charming piece in a lovely dark green. Not only did it offer the perfect storage solution, but with a few soft beige throw cushions, it also provided a cozy, additional seating area.
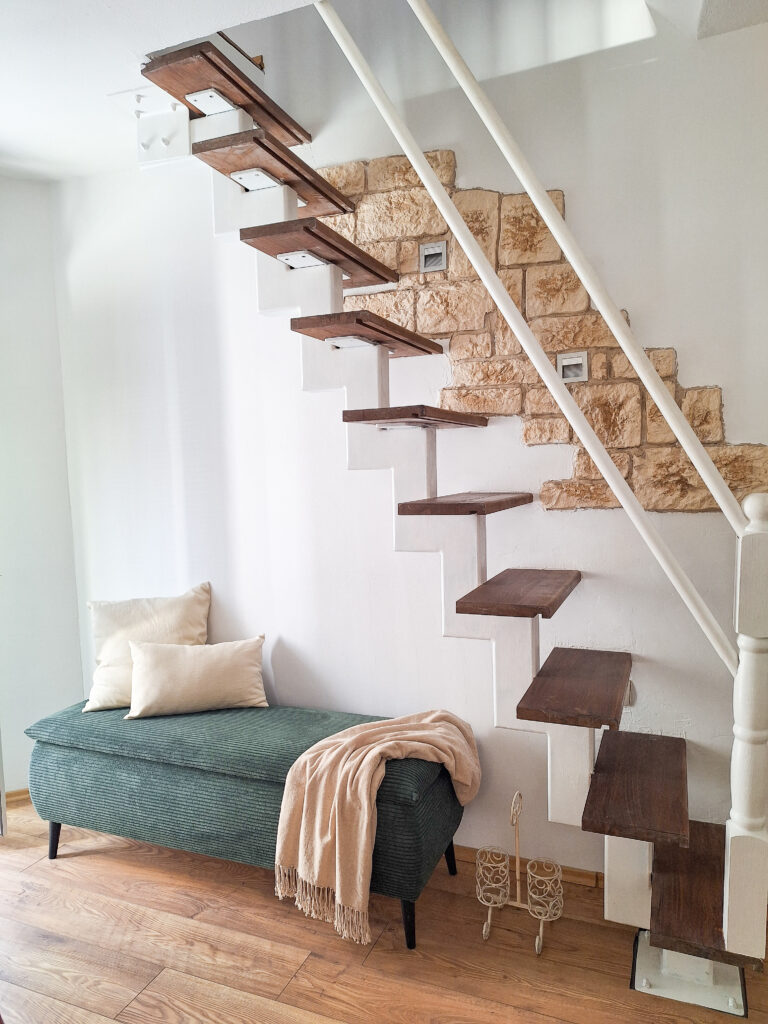
With the storage bench in place, the living room finally felt complete—a great balance of comfort, functionality, and charm. Now that this cozy space was finished, we were ready to move on towards the last major project: the kitchen.
The Kitchen
Since the bathrooms were in relatively good condition after a deep clean, we decided to leave them as they were to avoid delaying the renovation. With our deadline fast approaching, we made a compromise, focusing instead on the kitchen.
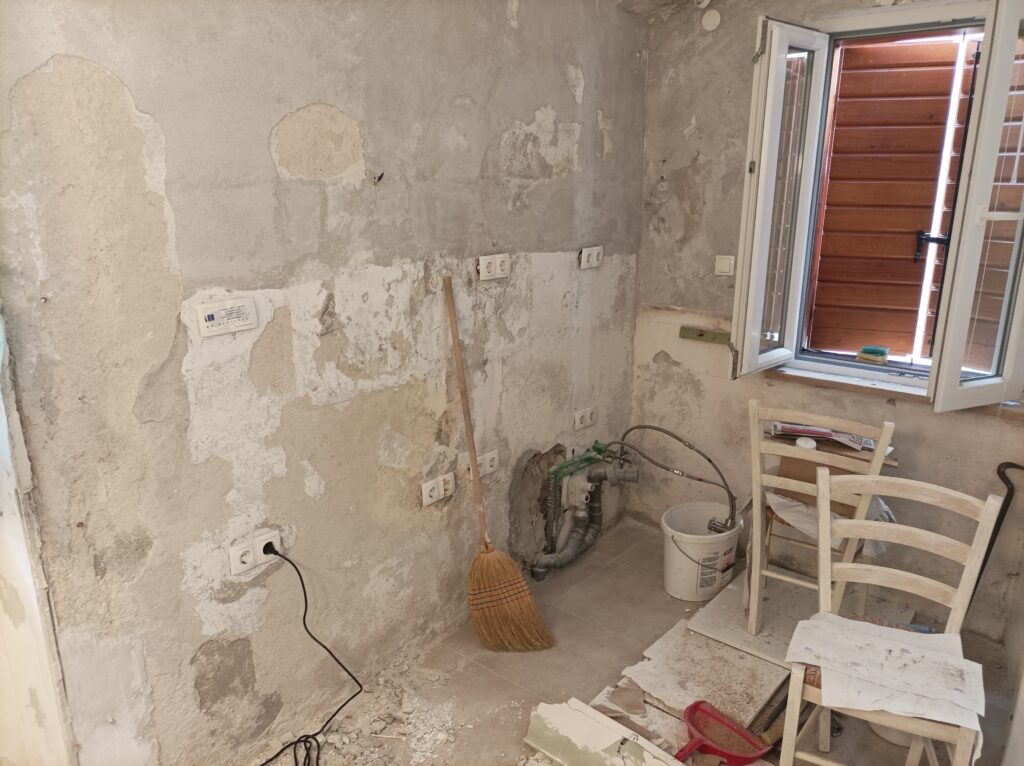
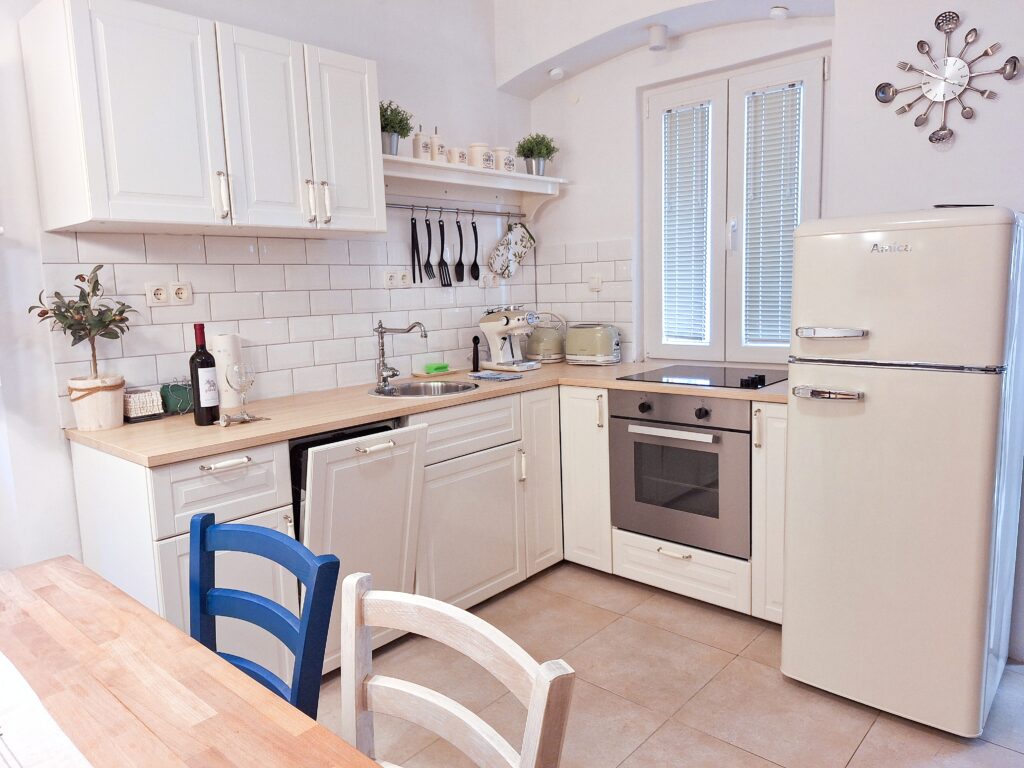
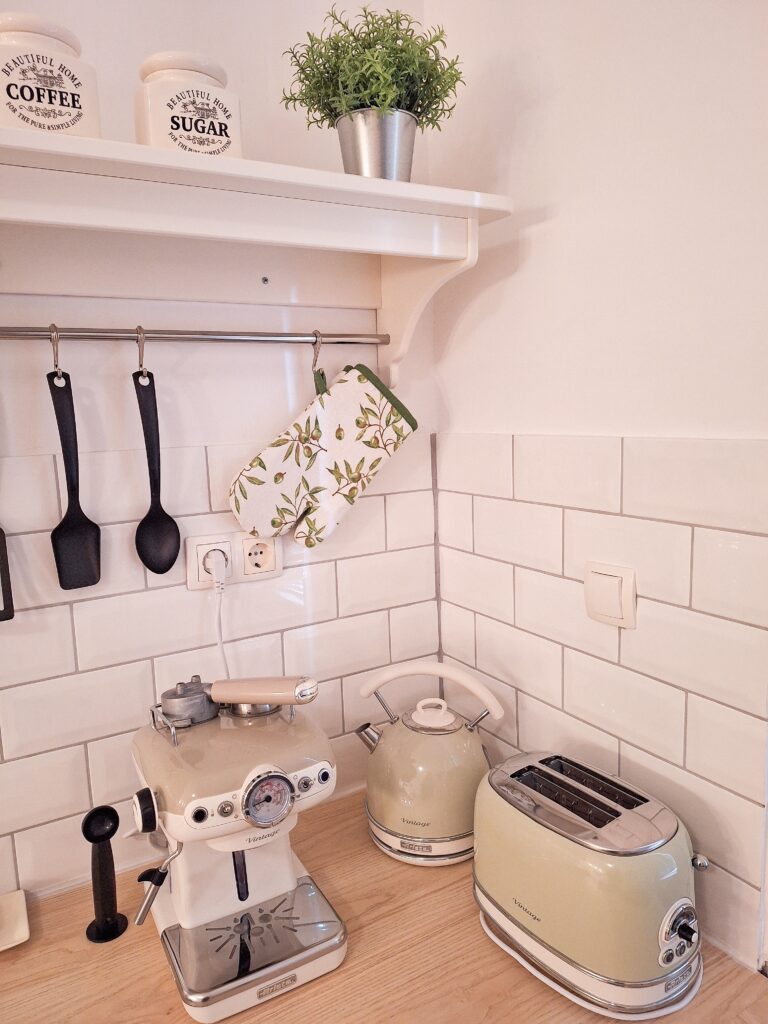
The kitchen layout presented a challenge, with two windows and walls of varying widths. Ultimately, we kept the original layout, modifying the IKEA Method system to fit perfectly within the quirky space. We chose cream Bodbyn fronts to maintain the rustic, homey vibe that had been a consistent theme throughout the renovation. I was thrilled to find a vintage-style fridge in the same shade, coordinating perfectly with the kitchen fronts for a seamless look.
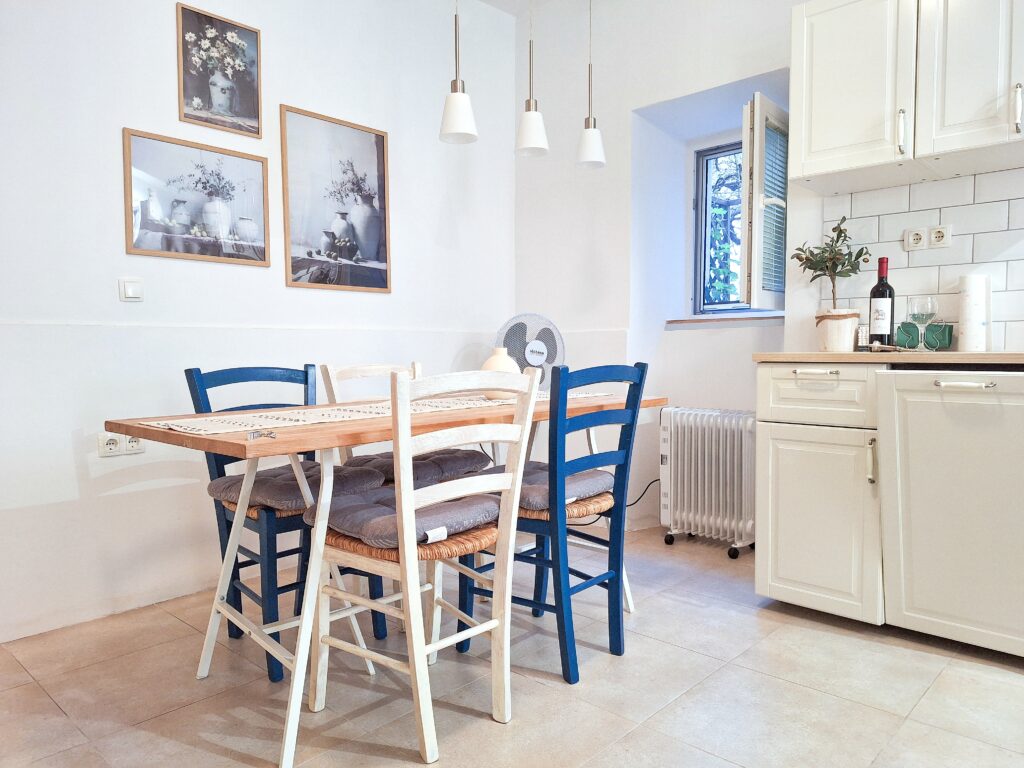
Given our limited budget, we were pleased to discover that the existing table and chairs fit perfectly with the warm, authentic ambiance we aimed for. To complete the look, we added some rustic-themed wall arts and a few charming appliances from Ariete’s vintage series, pulling everything together in a cohesive style.
Of course, there’s always room for improvement, and I already have tons of ideas for refining the space. But for now, we’re proud to have achieved our goal of welcoming our first guests in early July. But that, as they say, is a story for another time…
Curious to learn more? Just one click away, discover how to wow your guests on a budget and transform your rental to a boutique hotel.
Check out my Pinterest for more pictures and inspiration!
I’d love to hear your thoughts! Feel free to leave a comment below. Share your suggestions for further improvements, ideas, or any questions you may have. Let’s inspire each other!


